Look My Food's On TV!
Tuesday, December 27, 2011
Hungry Girls Chocolate Chip Softies
Verdict: Do they taste exactly like a chocolate chip cookie? No. They really don't taste anything like a chocolate chip cookie but they are chocolaty and sweet.
They remind of a cookie my mom and I used to buy all the time made with carob chips. I can't remember the brand or which store we used to find them at but they were pretty good for something sweet to eat and they were only 1 WW point apiece with the old point system. So I actually really like these HG Chocolate Chip Softies. I'll probably make these quite often. I do want to find a WW friendly chocolate chip cookie recipe that actually tastes like a chocolate chip cookie that isn't 5-7 points. Because really if a WW recipe is going to cost me 5-7 points per cookie I could just eat the real thing.
Hungry Girls says that this recipe makes 8 cookies at 2 WW points per cookie. When I inputted this recipe into the recipe builder on WW's it said that 8 servings would make these cookies 3 points apiece. Hmm, interesting. I just happened to make this recipe into 10 cookies and by doing so made the cookies 2 points a cookie. I used my medium sized cookie scoop. Below is the original HG recipe.
HG's Chocolate Chip Softies
from Hungry Girl
8 cookies, 2 WW points per cookie
Printer Friendly Version
3/4 cup whole wheat flour
1/2 cup Splenda No Calorie Sweetener (granulated)
6 T unsweetened applesauce
1/4 cup canned pure pumpkin
1/4 cup fat free liquid egg substitute
2 1/2 T mini semi sweet chocolate chips
2 T brown sugar, not packed.
3/4 tsp. vanilla extract
1/4 tsp. baking soda
1/8 tsp. salt
Pre heat oven 375 degrees.
In a mixing bowl combine all the dry ingredients except for the chocolate chips (flour, Splenda, brown sugar, baking soda, and salt). Mix well. In a separate bowl, mix together all wet ingredients (applesauce, pumpkin, egg substitute, and vanilla extract). Add this mixture to the dry ingredients, and stir until completely blended. Then, fold in the chocolate chips. Spray a large baking pan with nonstick spray or line with silicone baking mat, and spoon batter into 8 evenly spaced circles. Place pan in the oven for about 10 minutes (until cookies appear done and feel firm). Remove from the oven and allow cookies to cool slightly. For best results, enjoy while the cookies are still warm and the chips are still melty. I think they taste just as good room temperature.
Basic Pancakes
I was very proud of myself yesterday for not going straight to the fridge and pounding down leftover pumpkin pie tarts because it was very tempting. I had decided to stop waiting for tomorrow so I said no to the tarts and I opened up my new WW cookbook and made the Basic Pancake recipe out of it. Gold star for me. I stayed within my points all day. I made Will and his brother finish up our Christmas leftovers and I made myself pita pizzas for dinner. I give myself a pat on the back.
Today I packed up those pumpkin pie tarts and mini cheesecakes and took them to work. Yes, I still had access to them but I didn't eat any of them and I left all the other goodies staring at me alone as well. I made healthy choices for day two I ate more than my daily points but I just used some of my weekly points so all is good. My first goal is to have weight off by March 25. I don't really care how much weight off I would just like to steadily lose each week. Will and I are going to Arizona and I would like to be lighter when we fly. If we fly. We may drive if we can't get decent plane tickets. Though I'm not sure if our car would make it or not so flying may be our only option. Or I may have to go alone and I don't really want to have to fly alone because I feel like I'm in someones space sitting on the plane. At least when Will is with me I'm in his space. It isn't fun flying when your heavy. But come hell or high water I'm going because I need my Jessica time and I need to see my Noah boy. I miss living only 10 minutes from each other.
Anyway on to the pancakes. They weren't as fluffy as normal pancakes and that could have been due to me using skim milk. The recipe called for 1% but I only had skim on hand. I'm really not sure how old my baking powder is so that could be part of the problem as well. But other than that they were very tasty. I added vanilla extract which I thought gave the pancakes a very nice flavor.
Basic Pancakes
from WW New Complete Cookbook
6 servings (4 pancakes per serving), 7 WW per serving w/o syrup
Printer Friendly Version
2 cups all purpose flour
1/3 cup sugar
2 T baking powder
1/4 teaspoon salt
2 1/2 cups low fat (1%) milk
1/2 cup fat free egg substitute
1 T vegetable oil
1 T vanilla extract (optional)
In a bowl combine flour, sugar, baking powder, and salt. In another bowl combine milk, egg substitute, oil, and vanilla if using. Add milk mixture to flour mixture, stirring just until flour mixture is moistened (batter will be lumpy).
Spray a skillet with cooking spray and set over medium heat. Pour scant 1/4 cupfuls of batter onto skillet. Cook until bubbles appear and edges of pancakes look dry, about 3 minutes. Turn pancakes over and cook until golden brown on second side, about 3 minutes longer. Transfer to platter and keep warm. Repeat with remaining batter, making a total of 24 pancakes.
These reheated well.
Monday, December 26, 2011
Taking Control Today
Have you had that moment in your life when you stepped on the scale and went "Holy Blue Bonnets Batman! When did I get this big? When did the number on the scale go up this high?" I actually know the answer to those questions. I have gradually been seeing the number on the scale go up for the past two years but I keep telling myself I'll take control tomorrow. But tomorrow hasn't came. I need to take control today and stop with the tomorrows. Because if I have learned anything in the past two years is that life can be short and tomorrows can be limited. I see my future if I don't take control of my health. Yes, I have my diabetes and high blood pressure under control but I'm 29 and already have those problems. My doctor has been telling me the same thing that my moms doctor had told her for years, “If you lose the weight you will get off the medication.” Did she lose the weight? No. Have I lost the weight? No. My mom died at the age of 59 with a whole slew of issues after being bed ridden for two years in a nursing home. That isn't the future I want for myself but my body is only going to be able to handle this excess weight for so much longer before it starts to break down.
I think I'm having a hard time getting back on the wagon because I had been doing so well two years ago. I had lost almost 40 pounds when my mom passed away. I remember telling myself to not let myself gain it back. I let myself gain it back plus about 20 more. I need to stop beating myself up about it. It happened and now I need to do something about it. My mom would tell me to learn from my mistakes and move on. All I'm accomplishing now is depressing myself further and making myself gain more. Not very productive. I feel it in my clothes and just in the way I carry myself. I want to feel good again.
So I'm challenging myself to live a better life. To cook more, to eat less fast food, to bake more weight watcher friendly sweets, to start exercising, and to start taking care of myself. I am worth it. I am worth living a long, healthy, happy life. But nobody can do that for me but me. If I falter I'm going to not berate myself but just pick myself back up, brush myself off and move forward. I know I can do this.
So I started today. No more waiting for tomorrow. For Christmas I received the Weight Watchers New Complete Cookbook. It has over 500 delicious recipes for the healthy cook's kitchen. Best of all it includes the Points Plus values. This morning I made the Basic Pancake recipe which I will be posting about soon. This book has a lot of amazing recipes and I can't wait to try them. I also found some amazing food blogs that I believe God steered me too.
I first found Dashing Dish: Healthy Alternatives to the Foods You Crave authored by Katie Farrell. The food she is dishing out looks crazy good and is good for you. It was on her blog that I stumbled upon It Sux to Be Fat authored by Jennifer Swafford. Katie and Jennifer have partnered up. Jennifer has lost 100 pounds doing Weight Watchers and she is supplying Katie with the WW points for her fabulous food. So I headed over to It Sux to Be Fat and I'm so glad I did because Jennifer is such an inspiration. Her weight loss journey has spanned the last three years and she has had some ups and downs but she has never given up and I think that is the key. I'm really enjoying reading through her blog.
Another great weight watcher blog is Gina's Skinny Taste Her recipes are fantastic and you don't have to worry about the points because she does the hard work for you.
I also love Hungry Girl. I have several of her cookbooks and I get her weekly newsletter. I wish she could just come cook for me. Wouldn't that be nice.
I'm ready to tackle this new chapter in my life. I'm ready to take care of myself because I am worth it. Now I just need to get rid of all the temptations sitting in my fridge leftover from Christmas. :)
Friday, December 16, 2011
Sloppy Joes
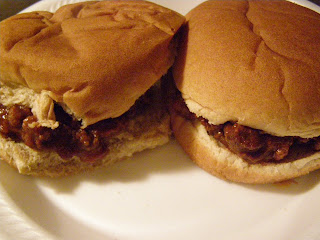
Raise your hand if you love sloppy Joe's. I don't see any hands raised. I'm not a huge fan of sloppy Joe's but I enjoyed this recipe. Will loves sloppy Joe's but my mans not into Manwich. He likes simple ketchup sloppy Joe's. These are simple yet tasty.
Sloppy Joe's
adapted from Heinz
8 servings, 6 WW points per serving
Printer Friendly Version
1/2 cup onion, chopped
1 lb. lean ground beef
1 1/2 cups ketchup
2 Tbsp. brown sugar
1 Tbsp. Worcestershire sauce
1/4 tsp. salt
1/4 tsp. pepper
8 light hamburger buns
In a skillet brown the beef and onions over medium heat. Once browned, drain. Place meat back in skillet and add the ketchup, brown sugar, Worcestershire sauce, salt, and pepper. Cook for 10 minutes or until thickened.
Monday, December 12, 2011
Mom's Lasagna
I think I have talked about my love of pasta before so I don't think I need to repeat it. Oh I do. Well I love pasta. I love my mom's lasagna. I don't know where this recipe came from I just know this is how mom made it and how she taught me to make it. Simple, yet so delicious. You can use the no boil noodles but my mom thought they tasted starchy so I still boil. But either way you do it people will be asking for seconds and for this recipe.
Mom's Lasagna
Printer Friendly Version
1 1/2 pd. lean ground beef
1 onion, diced
2 jars spaghetti sauce
1 large container cottage cheese
1/4 cup Parmesan cheese
2 eggs
2 bags shredded mozzarella cheese
1 box lasagna noodles
Pre-heat oven to 350 degrees
In a skillet brown the beef and onions. I like to season the meat with garlic powder, oregano, and basil or Italian seasoning. Drain beef. Place the meat back in the skillet and add the spaghetti sauce. Let simmer. Meanwhile boil the noodles according to the package directions. Drain. In a bowl mix together the cottage cheese, Parmesan cheese, and eggs. In a 9X13 pan spread in a thin layer of sauce. Lay down a layer of noodles, spread a layer of sauce, spread a layer of cottage cheese, sprinkle on mozzarella cheese. Repeat the layers ending with mozzarella. Bake for 1 hour or until heated through and the cheese is melty.
Friday, December 9, 2011
Milk Pie
My grandma used to make a milk pie. I never did get to experience my grandma's cooking because she died before I was born but my mom really liked her milk pie. She told me that after she would get done making pies she would piece together a crust in a pie plate with the pie crust scraps and right in the crust she would mix together milk, sugar, and vanilla. Mom didn't know the precise recipe. I tried finding a recipe that was like what grandma used to make and I came close one time. After my mom died I found out about Hoosier Cream Pies. Hoosier Cream Pies I think originated from the Amish. The recipe seemed similar to what my mom described as grandmas recipe. I finally made this pie and it's really easy and really yummy. I think mom would have loved it.
Milk Pie
recipe from Turkey Creek Lane
Printer Friendly Version
1/4 cup white sugar
1/4 cup brown sugar
1 egg yolk
2 heaping tablespoons flour
1 pinch salt
2 cups Milk or Cream (or enough to fill pie shell)
Preheat oven to 410 degrees. Mix brown and white sugar with flour. Sprinkle flour/sugar mixture over pie crust. Beat egg yolk with milk. Fill pie shell. Take a spoon and swirl it through the milk mixture a couple of times. Sprinkle with cinnamon or nutmeg.
Bake at 410 degrees for 10 minutes.Then bake at 350 for 45 minutes. The filling should be bubbling. The center should still jiggle. Be careful not to overcook or the filling will not set.
Homemade Milky Ways
"Lacey Klemm has made quite possibly the greatest dessert in her life, the Homemade Milky Way. It is addicting and i dare say, better than a real Milky Way." posted on Facebook by Will Klemm.
This is high praise coming from my loving hubby. He is correct in saying that these chocolate confections are addicting and better than the real Milky Ways.
My mom's favorite candy bar was the Milky Way. I have been wanting to find/create a homemade version for awhile. I just wish I would have thought about this before she passed away. She would have loved these.
I decided not to dip these fully because I was being lazy. No one missed them being fully dipped in chocolate. You can get away with not dipping if you don't want to. I highly recommend that you make these. Run, don't walk to your nearest grocery store!
Homemade Milky Way
adapted from Tasty Kitchen
2 bags (12 Oz. Size) Milk Chocolate Chips
1 container (7 Oz.) Marshmallow Fluff
6 Tablespoons Evaporated Milk, Divided
1 bag (14 Oz. Bag) Caramels, wrappers removed, or Caramel Bits
Place the chocolate chips in a microwave safe bowl. Microwave for about 45 seconds. Stir to completely melt all the chocolate. If you need to microwave further, do so for very short periods; you do not want the chocolate to burn. Stir in the marshmallow fluff and half of the evaporated milk.
Pour this into an 8×8 pan that has been lined with foil or wax paper and sprayed with non-stick spray. Smooth the top. Place this in the fridge to harden while you work on the next step. My 8x8 was being used for lasagna so I just used a cookie sheet and spread the marshmallow mixture out not too thick and not too thin.
Put the caramels and the rest of the evaporated milk in a bowl, and microwave until they are melted. Start with 45 seconds, and then stir. If needed, heat for longer, checking every 15 seconds. Once nice and smooth, pour and spread this over the chocolate mixture. Refrigerate for at least 4 hours.
If you are going to fully dip your Milky Ways:
Once firm, remove from the pan and cut into desired size pieces. Melt the remaining bag of chocolate chips in a microwave safe bowl in 45 second intervals. Once the chocolate is melted and smooth, start your dipping! Set the coated caramels on a baking sheet and then place it in the fridge or freezer to harden. Enjoy!If you are being lazy like me:
Melt the remaining bag of chocolate chips in a microwave safe bowl in 45 second intervals. Once the chocolate is melted and smooth pour the chocolate over the caramel layer and place back in fridge to harden. Once chocolate is set cut the Milky Ways into desired size pieces. Enjoy!
Sunday, November 13, 2011
Creamy Garlic Alfredo
(I doubled this recipe since I think you can never have enough Alfredo)
Creamy Garlic Alfredo
from Mel's Kitchen Cafe
Printer Friendly Version
8, 1/2 cup servings-6 WW points per serving for the sauce
1 cup of wheat pasta is 4 WW points
4 tablespoons butter
6 garlic cloves, minced (I used 3 tablespoons jarred minced garlic. It was very garlicky)
8 oz of reduced fat cream cheese, softened and cut into pieces
2 cups skim milk
5 oz Parmesan cheese, grated
1/2 teaspoon pepper
1/2 teaspoon salt
In a medium pot or skillet, melt the butter over medium heat. Add the garlic and cook for about 2 minutes, stirring constantly, taking care not to let the garlic burn. Add the cream cheese, stirring with a whisk until the mixture is smooth. It will look curdled at first, but with constant whisking for 2-3 minutes, it should come together to form a smooth, creamy paste. Add the milk gradually, about 1/4 cup at a time, whisking quickly and constantly until each addition is incorporated fully into the sauce. Stir in the Parmesan cheese, pepper and salt. Stir until the cheese is melted and the sauce is the desired consistency. Cook for 2-3 minutes for a thicker sauce or remove right after the cheese is melted for a thinner sauce. Serve immediately over hot, cooked noodles.
This reheats well too.
Black Bean and Beef Chili
from Smells Like Home
Printer Friendly Version
10 one cup servings, 4 WW points per serving
3 cans (14-15 oz) black beans
1 can (14 oz) diced tomatoes or pint jar of canned tomatoes
1 diced chipotle chili pepper (canned in adobo sauce) or a pinch of ground chipotle chile powder
1 – 2 tbsp olive oil
1 lb very lean ground beef (less than 10% fat)
1 medium red onion, very finely diced
1 tbsp regular chili powder
1 1/2 tbsp ancho chile powder
Pinch ground chipotle chile powder
2 1/2 tsp ground cumin
2 cups beef stock or 1 (15 oz) can beef broth
2 tbsp tomato paste
Juice of 1/2 lime
1/4 cup cilantro, chopped
Kosher salt and fresh ground black pepper, to taste
Instructions:
- Drain 2 cans black beans into colander and rinse well, until no more foam appears. Let beans drain while you use a food processor to puree the third can of undrained beans, diced tomatoes and liquid, and the diced chipotle chile pepper (or chipotle powder). Process the beans and tomatoes about 1 minute, until they are fairly smooth.
- In bottom of heavy soup pot or large Dutch oven over medium heat cook the beef and onions until the beef is no longer pink, drain. Add all the chile powders and cumin and saute about 30 seconds.
- Add beef stock, browned ground beef, pureed bean mixture, drained beans, and tomato paste and simmer over low heat, uncovered, 1 to 1 1/2 hours. Stir the chili occasionally to prevent any sticking on the bottom of the pot. After 45 minutes, check the seasonings and add more chile powder, salt, and/or pepper as needed. Or if using slow cooker add all the ingredients and cook on low for 4 hours.
- Just before serving Chili, stir in the chopped cilantro and lime juice and cook about 5 minutes. Serve chili hot with toppings of your choice.
Friday, November 11, 2011
Chocolate Chip Cookie Dough Cupcakes
inspired by Kevin and Amanda blog and Annie's Eats
Printer Friendly Version
Cookie Dough Ingredients:
1/2 cup butter, softened
1/2 cup caramel topping
1 cup sugar
1 cup packed light brown sugar
4 tablespoon water or milk
4 teaspoon vanilla extract
2 cup all-purpose flour
1/2 teaspoon salt
2 cups mini chocolate chips
For the cookie dough: In a medium bowl, combine the butter, caramel, and sugars for the cookie dough. Add the water (or milk), vanilla and blend. Mix in the flour, salt and 2 cup chocolate chips. The dough will be fairly soft. Using a small cookie scoop, scoop out the cookie dough and place them on a wax paper lined plate or baking sheet. Place them in the freezer to harden. I let them freeze for 2 to 3 hours. You should at least get 24 balls.
For the Cupcakes:
1 box of white cake mix or party chip or your favorite homemade recipe
Pre-heat the oven to 350 degrees.
Follow the instructions on the box to make the batter. Line two cupcake pans with cupcake liners. Fill each cupcake liner 2/3 full with the batter. Place a frozen cookie dough ball on the top center of each cupcake.
Bake at 350 for 16-18 mins.
3 sticks softened butter
3/4 cup light brown sugar, packed
4 cups powdered sugar
1/2 tsp. salt
2 tbsp. milk
1 tsp. vanilla extract
1 cup mini chocolate chips
In a mixer combine the butter and brown sugar in a mixing bowl and cream on medium-high speed until light and fluffy. Beat in the powdered sugar until smooth. Beat in the salt, milk, and vanilla extract until smooth and combined. Add in the chocolate chips.
Frost the cupcakes. I used a pastry bag with a large round tip to frost my cupcakes.
It makes 24 cupcakes.
Baked Potato Soup
Baked Potato Soup
adapted from Foodie with Family
Printer Friendly Version
12 one cup servings, 6 WW points per serving
Soup ingredients:
12 large baked potatoes, cooled (*see instructions below for directions on how to bake potatoes)
4 tablespoons butter, divided
6 tablespoons flour
1 onion, chopped finely
4 cups skim milk
6 cups chicken broth
2/3 cups Weight Watchers shredded Mexican cheese
salt and pepper to taste
garlic powder
optional: up to one cup of instant mashed potato flakes to thicken soup
Creamy onion topping
2 cups Greek yogurt
1 bunch green onions (scallions), cleaned, trimmed of roots and thinly sliced
1 teaspoon salt
In a bowl mix together the yogurt, green onions and salt. Cover with plastic wrap and place in fridge until ready to use.
To Bake Potatoes:
Preheat oven to 400°F. Gently scrub potatoes under cool running water to remove any dirt. Pat the potatoes dry on a baking sheet. Bake for 30-45 minutes, depending on the size of your potatoes. They are done when they yield to gentle pressure when you squeeze them. (Wear an oven mitt when squeezing them! ) When they are done, transfer to a rack on your counter to cool. Once cool peel off the skins and smash the potatoes in a large bowl and set aside.
Whisk the 6 cups of chicken stock into the thickened milk base and then stir all of the smashed potato innards into the soup. With the pot over medium heat, stir frequently to prevent scorching. You don’t need to boil the soup; you just need to get it steaming hot. When it is steaming check the consistency. If it is not thick enough for your liking, sprinkle two tablespoons of instant potato flakes over the top of the soup and stir in quickly. Wait a couple minutes and check the consistency of the soup again. You can continue adding potato flakes until it is as thick as you like it. We like our soup quite thick, so I have added as much as 1 cup of flakes before. Make sure, though, to wait a couple of minutes between additions as it takes a little while for potato flakes to reach full thickening power. Stir in the cheese until it is completely melted. Adjust flavors with salt, pepper and garlic powder to taste.
Remove the soup pot from the heat and serve immediately with Creamy Onion Topping, the bacon pieces, sliced green onions and shredded cheese.
BBQ Chicken Calzones
I found this recipe on Life as a Lofthouse's blog. Holly has some really great recipes and so far all the ones I have tried have been yummy. Will even liked these though he told me he would have liked them better without the green stuff, meaning the cilantro. I love cilantro and all this time didn't realize that he really doesn't. I really liked the filling for this calzone all by itself. I think it would make a great BBQ chicken salad.
BBQ Chicken Calzones
adapted from Life as a Lofthouse
Printer Friendly Version
10 servings, 4 WW points per serving
2 cans Country Style Biscuits (there are 10 biscuits in a can and they are smaller)
1 can Chunk Chicken, drained
1/2 cup BBQ sauce (I used Sweet Baby Ray's)
1/2 cup chopped red onion
1/2 cup Real Bacon Pieces like Oscar Meyer's
2/3 cup shredded Weight Watchers Mexican Cheese or low fat cheese
1/4 cup chopped cilantro
In a bowl, mix together the chicken, BBQ sauce, onion, bacon, cheese, and cilantro together. Remove biscuit dough from cans. Take one dough piece and lay out on a clean surface. Roll out flat into a circle. Repeat with all dough circles.
Wednesday, November 2, 2011
Pumpkin and Apple Donuts
Pumpkin Donuts
from Culinary Cory
2 cups flour
1 ½ tsp. baking powder
½ tsp. salt
¼ tsp. baking soda
1 tsp. nutmeg
2 tsp. cinnamon
½ cup brown sugar
1 cup canned pumpkin
2 eggs
2 Tbl. milk
¼ cup unsalted butter, room temperature
1 tsp. vanilla extract
Preheat the oven to 375 degrees. Sift the flour, baking powder, salt, baking soda, nutmeg and cinnamon in a small bowl. Set aside. Cream together the brown sugar, canned pumpkin, eggs, milk, butter and vanilla extract until the butter is well incorporated. With your mixer on medium low speed, slowly add the dry sifted ingredients to the wet mixture. Mix until just barely combined. Be careful of over mixing.
Spray the donut pan with cooking spray and fill each donut mold halfway with the pumpkin batter. Bake at 375 degrees for 6 – 8 minutes or until the exterior springs back when touched. Allow to cool completely and top each donut with cinnamon glaze.
Cinnamon Glaze
½ cup powdered sugar
1 Tbl. milk
½ tsp. cinnamon
¼ tsp. nutmeg
Mix until smooth and creamy. The glaze should pour easily from a spoon. You may need to add additional milk or powder sugar to get the right consistency.
Apple Donuts
from the Savvy Kitchen
- 1 1/2 cups all purpose flour
- 1/2 cup sugar
- 1 1/2 tbsp. baking powder
- 1/2 tsp. salt
- 1/2 tsp. ground nutmeg
- 1/4 cup butter, softened
- 1 large egg, beaten
- 1/2 cup low-fat milk
- 1 cup cored and finely diced apples
- 1/4 cup butter, melted
- 1/2 cup sugar
- 1 tsp. ground cinnamon
Preheat the oven to 350 degrees F.
Store in an airtight container.
Tuesday, October 18, 2011
Tortellini Salad
Tortellini Salad
a Lacey creation
Printer Friendly Version
1 large package of refrigerated Buitoni Mixed Cheese Tortellini
1 package of cherry tomatoes, washed
1/4 cup thinly sliced red onion
1 package Real Bacon Bits for recipes
1 pint bottle Hidden Valley Ranch dressing
Cook the tortellini according to the package directions, drain and let cool. Once cool place in a large bowl with the remaining ingredients and mix well. Refrigerate until ready to serve. I recommend making the day before or several hours before serving so the flavors meld.
Queso
Queso
Printer Friendly Version
32oz. Velveeta (New Queso Blanco flavor)
1 can Rotel Mild Diced Tomatoes and Green Chilies, drained
1 can Rotel Diced Tomatoes with Lime and Cilantro, drained.
Cut up the Velveeta and place it in a pot with the drained cans of Rotel. Place the pot over a medium low heat and stir frequently to melt. Once melted place in a crock pot on keep warm setting to keep warm or just place in a bowl and eat.
Or you can place the cut up Velveeta and Rotel right in the crock pot and place on low to melt before a party. Change to keep warm once melted.
Serve with chips.
Caution to all Bakers-Banana Bread
This is banana bread. This poor banana bread got a little burnt. But it still tasted great. I titled this post caution to all bakers because I could have avoided burning the bread if I would have checked the temperature on the oven. I thought the oven was running a little hot but didn't think about it. I'm glad I set the timer for half the baking time the recipe called for or this bread would have been completely black. I just had a feeling. When I noticed the burning smell I checked the temp and it had gotten bumped up to 500 degrees. I'm glad I didn't burn the house down. I really wish I hadn't burnt it because it was a going away present for one of my co-workers. Banana bread is her favorite. She got a promotion and is going to work at the Main Library. All the best luck to her.
This recipe is so easy. You don't even need a mixer. Just mix together with a big spoon.
Banana Bread (Recipe reflects the doubling I did)
from Simply Recipes
Printer Friendly Version
6 or 8 ripe bananas, smashed
2/3 cup melted butter
2 cup sugar (can easily reduce to 3/4 cup)
2 egg, beaten
2 teaspoon vanilla
2 teaspoon baking soda
Pinch of salt
3 cups of all-purpose flour
Preheat the oven to 350°. With a wooden spoon, mix butter into the mashed bananas in a large mixing bowl. Mix in the sugar, egg, and vanilla. Sprinkle the baking soda and salt over the mixture and mix in. Add the flour last, mix. Pour mixture into 5 small buttered loaf pans. Bake for 1 hour. Cool on a rack. Remove from pan and slice to serve.
Vanilla Peanut Butter Pie
These were yummy.
Vanilla Peanut Butter Pie
slightly adapted from Recipe Source
Printer Friendly Version
1/3 cup peanut butter
1 cup powder sugar
1 small package vanilla pudding
1 box refrigerated pie crusts
1 8oz Cool Whip or Homemade Whipped Cream
Pre-heat oven to 350 degrees
Spray a 24 cup mini muffin pan with cooking spray and set aside.
On a lightly floured surface roll out the pie crust a little thinner then what it is. Using a round cookie cutter or a glass cut out 12 rounds. Fit the rounds into the muffin cups. Repeat with the other pie crust. Lightly prick the crusts with a fork and bake for 10 minutes or until lightly brown.
While the crusts are baking make the vanilla pudding according to the package directions and put in the fridge to set up. In a bowl mix together the peanut butter and powder sugar until crumbly.
Once the pie crusts are baked and cooled start assembling them. Sprinkle in about a teaspoon of the peanut butter mixture into each shell. Top with vanilla pudding. Top with whipped cream. Sprinkle with more peanut butter mixture. Enjoy!
Baked Chicken Chimichangas
I thought that these chimichangas were really good. Will didn't even have any. That night Will and I got into a fight over how he thinks all I make is Mexican food so he made himself a sandwich. I admit to making Mexican food at least once a week but it's not everyday like he claims. I also admit that this dish would have been way too spicy for him. So I was a little off my game at picture taking. The recipe calls for making your own tomatillo sauce using canned tomatillos but I couldn't find any so I used Salsa Verde and doctored it up. I thought it was fantastic, but spicy. So if you don't like spice you might want to steer clear.
Baked Chicken Chimichangas
from So Tasty, So Yummy
Printer Friendly Version
2 teaspoons cumin
1 teaspoon garlic powder
1 teaspoon onion powder
1 teaspoon chili powder
1 teaspoon cornstarch
2 boneless skinless chicken breasts
1 can Rotel tomatoes with chilies
¼ cup water
4 burrito (large) size tortillas
1 cup shredded reduced fat Mexican cheese
Combine spices and cornstarch in a small bowl. Sprinkle the bottom of the crockpot with the spice mixture. Top with the chicken, Rotel and water. Cover and cook on low for 4 to 6 hours. Shred the chicken with two forks and cook for 30 minutes more.
Preheat the oven to 425 degrees. Grease a large cookie sheet. Combine the shredded chicken with the cheese. Lay out the tortillas and top each with ¼ of the chicken mixture. Roll up the tortillas burrito style, placing them seam side down on the cookie sheet. Spray the top of the Chimichangas with cooking spray. Bake for 20 minutes. Serve with queso or Deluxe Tomatillo sauce. Garnish with sour cream, tomato and cilantro.
Deluxe Tomatillo Sauce
1 can (28 ounces) tomatillos, drained (Or I used four 7 ounce cans of La Costena Salsa verde)
1 cup chicken broth
1 teaspoon cumin
1 teaspoon fresh lime juice
2 tablespoons cilantro, minced
1 clove garlic, minced
½ jalapeno, minced (I did not use)
¼ teaspoon salt
¼ teaspoon sugar
1 cup sour cream
In a saucepan, combine tomatillos, broth, cumin, lime juice, cilantro, garlic, jalapeno, salt and sugar. Bring to a boil, reduce heat and simmer for 20 minutes. Remove from heat. Puree until smooth with an immersion blender. You can skip the puree step if using salsa Verde. Return to heat, stir in the sour cream and cook 3 minutes more until heated through.
Pumpkin Butterscotch Blondies
Make these today.
Pumpkin Butterscotch Blondies
from Smells Like Home
Printer Friendly Version
2 cups all-purpose flour
1 tbsp. pumpkin pie spice
1 tsp. baking soda
3/4 tsp. salt
2 sticks unsalted butter, at room temperature
1 1/4 cups granulated sugar (or brown sugar)
1 large egg
2 tsp. vanilla extract
1 cup canned pumpkin
1 cup white chocolate chips
1 1/2 cups butterscotch chips
Instructions:
- Preheat the oven to 350° F. Line a 9×13-inch baking dish with foil. In a medium bowl, combine the flour, pumpkin pie spice, baking soda and salt. Stir together and set aside.
- In the bowl of an electric mixer fitted with the paddle attachment, beat together the butter and sugar on medium-high speed until light and fluffy, about 2 minutes. Beat in the egg and vanilla until well combined. Mix in the pumpkin. With the mixer on low speed add the dry ingredients and mix just until incorporated. Fold in the white chocolate and butterscotch chips with a rubber spatula.
- Spread the batter evenly into the prepared. Bake until the edges begin to pull away from the sides of the pan and a toothpick inserted in the center comes out with just a few crumbs, about 35-40 minutes. Transfer the pan to a wire rack and let cool completely before cutting.
- To serve, lift the cake from the pan using the foil and transfer to a cutting board. Peel off the foil and using a sharp knife, cut into 24 squares.
Sunday, October 16, 2011
Meal Plan for the week of 10/17/2011
Monday: Breakfast Bowls (Recipe to come)
Tuesday: Pita Pizzas
Wednesday/Thursday: Soy Garlic Chicken (Recipe to come)
Friday: Spaghetti
Saturday: Dinner Out
Sunday: Leftovers
Monday, September 26, 2011
Philly Cheesesteak Sloppy Joes
I liked these sloppy joes. Do they taste exactly like a Philly Cheesesteak? No, but they have a really good flavor with the onions, green peppers, and mushrooms. I could have done without the cheese sauce. The original recipe called for provolone but I couldn't find what I needed at the store. I'm thinking that the provolone would have been better. I should have just gotten a chunk at the deli but I was tired and didn't want to have to go back that way. So I settled for a block of reduced fat mild cheddar. Will and I both agreed that it didn't have a lot flavor. Maybe I should have used sharp cheddar. I think even a slice of melted provolone would have been better. So yeah I could have done without the cheese, which I don't say very often, but the meat was really good.
Philly Cheesesteak Sloppy Joes
adapted from A Taste of Home Cooking
8 servings, 4 WW points per serving includes 2 point hamburger bun
2 tablespoons of the cheese sauce adds 2 WW points
Printer Friendly Version
1 tablespoon olive oil
1 pound really ground beef
1/2 tablespoon garlic powder
1/2 large onion, diced
1 green pepper, diced
2 tablespoons steak sauce
1 cup beef broth
1 small can sliced mushrooms, drained
8 low calorie and fat hamburger buns
1 tablespoon butter
1 tablespoon flour
1 cup milk
1 cup reduced fat mild cheddar, shredded
In a large skillet heat the oil and add the onion and green pepper. Cook for about 5 minutes, until the vegetables start to get tender. Add the ground beef and garlic powder and brown the beef until cooked through. Drain. Place the beef mixture back in the pan and add the steak sauce, beef broth, and mushrooms. Bring to a bubble and cook for 2 minutes.
While the meat is cooking, melt the butter in a medium-size pot over medium-high heat. Stir in the flour and cook about 1 minute. Whisk in milk, bring up to a bubble and let thicken, about 2 minutes. Turn off heat and stir the cheese.
To serve, place a scoopful of the meat mixture onto the bottom of the rolls, then top with the cheese sauce and replace the top of the roll.
Strawberry Whipped Cream Cupcakes
These were fabulous too. Like a strawberry shortcake.
Strawberry Whipped Cream Cupcakes
a Lacey creation
Printer Friendly Version
24 yellow cupcakes, (I used a yellow cake boxed mix)
1 cup mashed strawberries
1 cup sugar
3/4 cup water
3 tablespoons cornstarch
16 oz heavy cream
2 cups powder sugar
In a small saucepan combine the sugar and cornstarch. Add the strawberries and water. Bring to a boil stirring constantly. Cook for three minutes or until it thickens. I didn't time it but it didn't take long for the mixture to thicken. Remove from heat and let cool.
While that's cooling make the whipped cream. I used my kitchen aide to make my icings. I placed my mixing bowl in the fridge to get cold. Pour the heavy cream into the bowl and use the paddle attachment to beat the cream. Set on medium and let it beat for 5 minutes. Add in the powder sugar and let beat until it starts to thicken. If it doesn't add more powder sugar a little at a time.
Southwestern Chicken Drumsticks
Printer Friendly Version
6 servings, 3 WW points per drumstick
6 drumsticks, thawed and skin removed
4 tablespoons butter
1 cup salsa
1/2 tablespoon minced garlic
1/2 teaspoon dried cilantro
1/2 teaspoon cumin
1/2 teaspoon chili powder
salt
pepper
Pre-heat the oven to 350 degrees.
Place the drumsticks in a baking dish. Sprinkle with salt and pepper. In a bowl melt the butter. Mix in the salsa, garlic, cilantro, cumin, and chili powder. Pour over the chicken. Bake for 40 minutes or until the chicken is cooked through. When you serve pour some sauce over the chicken.
Sunday, September 25, 2011
Meal Plan for the week of 9/26/2011
Tuesday: Philly Cheesesteak Sloppy Joes (Recipe to Come)
Wednesday/Thursday: Black Bean and Beef Chili (Recipe to Come)
Friday: Jessica will be in town. Let the feeding frenzy begin.
Saturday: Cassandra's wedding.
Sunday: Jessica will still be in town.
Mini Peach Pies
These pies were really good. Nice and peachy.
Mini Peach Pies
taken from Cook Au Vin
Printer Friendly Version
8 cups ripe peaches, skins on (I used a 4 pound container from Sam's it was just enough)
1 1/3 cups sugar
6 tablespoons flour
1/2 teaspoon ground nutmeg
1 teaspoon vanilla
3 tablespoons butter
1 packaged refrigerated pie crust
Pit the peaches and dice into a small dice. In a large bowl, gently stir together the peaches, sugar, flour and nutmeg. Let rest for 20-30 minutes until the juices release and syrup begins to form. Place a strainer over a large soup pot and place the peach mixture into the strainer. Allow the syrup to fall into the pan, reserving the peaches. Bring the liquid to a boil over medium heat, reduce to low and cook for 10 minutes or until the liquid begins to thicken. Stir in the peaches. By adding the peaches in last, you avoid overcooking them and turning them to mush. Mine cooked for about 5 minutes and it thickened so I added the peaches and cooked for about 5 more minutes.
Off heat, add the vanilla and butter, gently stirring until the butter melts. Let cool to room temperature. The filling can be made in advance and refrigerated.
Lightly dust your work surface with flour. Unroll one of the pie crusts and using a rolling pin thin out the dough just a little bit. Cut circles big enough to fill a mini-muffin well. Gently place the circles into the muffin tin as if you were filling a pie plate. Fill with pie filling, almost to the top. With remaining dough pieces, gently cut out whatever shape you want to top it with. I cut strips for these, but you could cut out small hearts or stars. Or just cover with rounds. With one box of pie crusts I was able to make about 32 mini pies. I had enough pie filling to make a whole pie. Which in the original recipe she did. Or you could make 32 more mini pies. So you could 1/2 the filling recipe.
Bake the mini pies at 425 degrees for 10 minutes.
Tuesday, September 20, 2011
Beef Roll Ups
Beef Roll Ups
Printer Friendly Version
6 roll ups w/extra stuffing and gravy, 7 WW points per roll ups w/extra stuffing and gravy
6 Steak umms, thawed leave the parchment paper on
1 box stuffing
2 jars beef gravy
mash potatoes
Pre heat the oven to 400 degrees
Prepare the stuffing according to the box directions. In a 8 inch square baking dish pour one jar of gravy. Take a Steak umm leaving it on the parchment paper it came on. Spoon about two tablespoons of the stuffing onto the short end of the Steak umm and roll up. Use the paper to help you roll up the Steak umm. They are fragile. Place the roll up seam side down onto the gravy. Repeat with the remaining Steak umms. You will have stuffing left over. I spooned the rest of the stuffing over the roll ups and then topped with the other jar of gravy. Bake for 30 minutes. Serve with mash potatoes. The potatoes will add extra points.
Monday, September 19, 2011
Meal Plan for the week of 9/19/2011
Tuesday: Pita Pizzas
Wednesday/Thursday: Pulled Pork Sandwiches (Pork provided by my Godmother, which she got from the Apple Orchard)
Friday: Southwestern Chicken Drumsticks (Recipe to Come)
Saturday: Eat Out
Sunday: Left Overs
Angie's Taco Pie
Angie's Taco Pie
adapted from Gooseberry Patch
Printer Friendly Version
4 servings, 10 WW points per serving
1, 7oz package of Sweet Yellow Cornbread and Muffin Mix
1/2 lb. really lean ground beef
1/2 small onion, diced
1/6 cup or 2 tablespoons and 2 teaspoons of taco seasoning
1/2 cup salsa
2 0z of green chili's
1/2 tablespoon brown sugar Splenda or just brown sugar
1/2 teaspoon garlic
1/2 cup water
sprinkle of red pepper flakes (optional)
salt and pepper to taste
3/4 cup reduced fat shredded Mexican cheese
Pre-heat oven to 400 degrees.
Prepare the cornbread according to the package directions. Spray a 8 inch square or round baking pan with cooking spray and pour in the cornbread batter. Set aside.
In a skillet brown the ground beef and onion. Drain. Place back in skillet and add the next eight ingredients. Let cook for 10 minutes or until some of the water has reduced. Spoon beef mixture over the cornbread batter and top with cheese. Bake, uncovered, for 20-25 minutes or until the cornbread has set. The cornbread pretty much completely rises over the beef mixture and cheese. Feel free to use your favorite taco meat recipe. The original recipes just calls for beef mixed with taco seasoning then topped with salsa and cheese. Nothing wrong with that but I wanted to kick it up and notch and I have to hide salsa inside the meat or Will won't eat it.
Next time I think I might make these into individual muffins.
Chicken Souvlaki Pitas
from Dinners for a Year and Beyond
Printer Friendly Version
4 servings, 9 WW points per servings
1 (6 ounce) container plain Greek Yogurt
1/4 cup shredded cucumber
1/4 cup lemon juice, divided
1/4 teaspoon garlic salt
1/4 cup olive oil
1 teaspoon oregano
1/4 teaspoon salt
1/4 teaspoon pepper
2 boneless skinless chicken breasts
4 pitas
sliced tomatoes
sliced red onion
reduced fat feta
In a small bowl, combine the yogurt, cucumber, 1 tablespoon lemon juice, and garlic salt. Set aside.
In a large resealable bag, combine the remaining lemon juice, olive oil, oregano, salt, and pepper. Add the chicken and seal bag. Make sure the marinade covers all the chicken. Marinate the chicken in the refrigerator for 30 minutes up to overnight.
She grilled the chicken but I baked it in the oven. Pre-heat the oven to 35o degrees. Place in a baking dish and bake for 30 to 40 minutes or until chicken is cooked through. To serve, heat the pitas for about 30 seconds in the microwave. Cut the chicken up and distribute evenly between the four pitas. Top with tomato, onion, feta, and cucumber sauce.
Tuesday, September 13, 2011
Meal Plan for the week of 9/12/2011
Tuesday: Beef Roll Ups w/ Mash Potatoes and Gravy (Recipe to come)
Wednesday/Thursday: Cheese Tortellini Soup
Friday: Eat Out
Saturday: Angie's Taco Pie (Recipe to come)
Sunday: Left Overs
Monday, September 5, 2011
Hashbrown Pork Chop Casserole
from The Country Cook
8 servings (4 oz pork chop, 1 cup potatoes), 8 WW points per servings
Printer Friendly Version
4 pork chops (I used a 2 lb package of boneless thick cut pork chops called grillers)
1 tablespoon of oil
1 cup reduced fat sour cream
1 can (10 3/4 oz) 98% fat free cream celery soup
1/2 cup skim milk
32 oz package frozen shredded hash browns, thawed
1 onion, diced
1 cup shredded reduced fat Mexican cheese
Pre-heat oven to 375 degrees
Season the pork chops on both sides with seasonings of choice. I used salt, pepper, and garlic. In a large skillet heat the oil and brown the pork chops on both sides. Don't cook through because they will finish cooking in the oven.
In a large bowl combine the, sour cream, celery soup, milk, hash browns, onion, and cheese. Spray a 9X13 baking dish with cooking spray and spread in the hash brown mixture. Top with pork chops. Bake uncovered for 45-50 minutes or until heated through and pork chops are fully cooked.