Look My Food's On TV!

Tuesday, April 26, 2011

Easter Dinner


I hope everyone had a nice relaxing, stuff your face kind of Easter. I know I did. Will and I spent a relaxing morning at home and then in the afternoon we went over to my Godparents house for the wonderful food on that plate in the picture. And for the wonderful company. I will be posting recipes for the corn casserole and the sweet potato casserole I made real soon. I think my favorite food on that plate is the mac and cheese. I only get it on the holidays. My Aunt Faye makes the best mac and cheese. Not that I couldn't make the mac and cheese at home but then I would eat it and I'm sure the points are out of control. Maybe I'll share that recipe too. Although it's not really a recipe. The only two ingredients are macaroni and Velveeta cheese. It's so good!

What's your favorite holiday food?

Sunday, April 24, 2011

Won Ton Spinach Lasagna

I'm not sure if I have mentioned it before but I love cookbooks. I have an addiction. I may need some professional help if I keep buying them. But I have gotten better. Most of the cookbooks I buy get sent to me in the mail. Instead of just paying for each one like I used to do I study each cookbook from front to back to see if it's something I really want to keep. The cookbooks that only have one or two recipes I like get sent back. Why keep a cookbook when I'm not excited about the recipes in it. I have gotten better and I don't just keep them all. Maybe I don't need therapy after all. :)

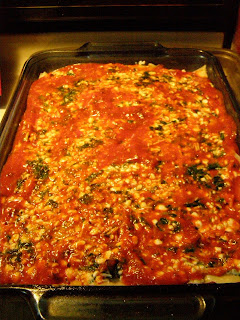
Anyway I received Southern Living All Time Favorites cookbook a couple of weeks ago and it is a keeper. When I found the won ton spinach lasagna recipe I knew that would be the first one I would try. And it's under the fresh and healthy section. Sounds good to me. I love lasagna and any other pasta type dish. I stay away from them because no matter how I try I can't seem to keep the points down. I would never have thought of using won tons. I was intrigued. The nutrition info had each serving at 272 calories and only 7.1 grams of fat. If I would have followed the recipe to a T the WW points would have been 7 per serving. Since I can't seem to follow a recipe down to the letter my version came out to 8 WW points per serving. Not bad I don't think. The best part is that this tastes like lasagna. I wouldn't say it's exactly like my normal lasagna because won ton wrappers are a lot thinner than lasagna noodles and you don't get that chewy noodle texture but overall this was excellent. I will definitely be making this again. Will really liked it too.

Won Ton Spinach Lasagna
adapted from Southern Living All Time Favorites Cookbook

Printer Friendly Version


8 servings, 8 WW points per serving

2 cups shredded mozzarella cheese, divided
1 teaspoon dried basil
1 container (24 oz) fat free cottage cheese
1 (10 oz) package frozen chopped spinach, thawed and well drained
1 cup shredded carrots (I left the carrots out)
1/2 cup Italian shredded cheese
2 egg whites
1/2 teaspoon garlic powder
1 (26 oz) jar spaghetti sauce
36 won ton wrappers
cooking spray

In a bowl combine 1 cup of mozzarella cheese, 1 teaspoon basil, cottage cheese, spinach (make sure it is well drained), carrots if using, Italian cheese, egg whites, and garlic. Set aside.

Spray a 9X13 pan with cooking spray. Spread 1/2 cup of the sauce in the pan. Arrange twelve of the won ton wrappers over the sauce. They will overlap some. Top with one-third of the cottage cheese mixture. Spoon one-third of the spaghetti sauce over the cottage cheese mixture. Repeat layers twice, ending with the spaghetti sauce. Sprinkle evenly with remaining 1 cup mozzarella cheese.

Bake at 350 degrees for 45 minutes or until bubbly and cheese melts. Let stand 10 minutes before serving.

Ricotta can be substituted for the cottage cheese. Make sure the won tons are covered in sauce so they don't get burnt while cooking.


Layer of won ton wrappers.


Layer of cottage cheese mixture.


Layer of spaghetti sauce.


Lasagna after baking for 45 minutes. The cheese is all melted and it's just waiting to be eaten.

Tomato Tortellini Soup

This isn't the greatest picture. I was trying to get the tortellini in the photo but it wasn't cooperating. This recipe is out of Taste of Homes 2011 Annual Recipe cookbook. This soup is so easy to make and it takes less than 30 minutes to cook. I made it before I went to work one afternoon. It tastes really good to. It's like eating tomato soup with the grilled cheese inside the soup. If you prefer grilled cheese over tortellini leave the tortellini out and make yourself a grilled cheese. But the cheese tortellini is really good and makes this soup extra special. I won't be making this a lot only due to the fact that it is pretty rich and it came out to be 6 points per cup. I don't know about the rest of you but I hardly eat just one cup of soup at a time.

Tomato Tortellini Soup
adapted from Taste of Homes 2011 Annual Cookbook

Printer Friendly Version


10 one cup servings, 6 WW points per serving

1 package (9 ounces) refrigerated cheese tortellini, (I had about 2 1/2 cups leftover from another recipe. The WW points are calculated for 2 1/2 cups)
2 cans (10 3/4 ounces each) reduced sodium condensed tomato soup, undiluted
2 cups chicken broth
2 cups skim milk
2 cups half and half cream
1 can diced tomatoes
1 teaspoon onion powder
1 teaspoon garlic powder
1 teaspoon dried basil
1/2 cup shredded Parmesan Cheese (I used grated since that is what I had on had)

In a Dutch oven, combine the soup, broth, milk, cream, tomatoes, and seasonings. Heat through, stirring frequently. When soup is hot add the tortellini and cook for seven minutes or until tortellini are cooked through. Stir in cheese. To serve sprinkle with additional cheese if desired.

Saturday, April 23, 2011

Caramel Chocolate Chip Cookie Dough Cheesecakes

For my friend Kris's wedding I'm going to be making cheesecakes. So a week or so ago I decided to try out a couple different recipes. The cheesecake with the strawberry on it is white chocolate strawberry but I wasn't happy with the end result and won't be posting a recipe until I have perfected it. It tasted good, it just wasn't what I had imagined. But the cookie dough ones were awesome. So so so so sooooooooo goooooood!!!!! These babies are sinful good.


Caramel Chocolate Chip Cookie Dough Cheesecakes
adapted from My Kitchen Cafe

Printer Friendly Version


For the Crust:

2 sleeves cinnamon graham crackers, finely crushed
1/2 stick of butter, melted

For the Filling:

4 (8 oz) packages cream cheese, softened
1 cup sugar
1 cup sour cream
3 Tbsp. Flour
1 Tbsp. Vanilla
4 eggs

For the Cookie Dough:

1/4 cup butter, softened
1/4 cup caramel topping
1/2 cup sugar
1/2 cup packed light brown sugar
2 tablespoon water or milk
2 teaspoon vanilla extract
1 cup all-purpose flour
1/4 teaspoon salt
2 cups mini chocolate chips

For the cookie dough: In a medium bowl, combine the butter, caramel, and sugars for the cookie dough. Add the water (or milk), vanilla and blend. Mix in the flour, salt and 1 cup chocolate chips. The dough will be fairly soft. Using a small cookie scoop, scoop out the cookie dough and place them on a wax paper lined plate or baking sheet. Place them in the freezer to harden while making the rest of the cheesecake.

Prepare the crust by mixing the graham crackers and the butter in a bowl. On a cookie sheet place 18 to 20 jumbo foil cupcake liners. Place about two tablespoons of crust mix in each cup and press down over the bottom and a little bit up the sides. Set aside.

For the filling:

Pre-heat oven to 325 degrees.

Beat the cream cheese and sugar until blended. Add the sour cream, vanilla, and flour; mix well. Add eggs one at a time until fully incorporated.

Take out the cookie dough balls and get ready to assemble the cheesecakes. Place a couple tablespoons of cheesecake batter into each foil cup. Place two cookie dough balls on top of the batter. Sprinkle the remaining 1 cup of mini chips evenly between the foil cups . Fill each cup almost to the top with remaining cheesecake batter. Break up the remaining cookie dough balls into small pieces and evenly distribute between the cheesecakes.

Bake for 20 minutes or until the centers are almost set. Let cool and drizzle with caramel and melted chocolate.

Sit back with one of these babies and a tall glass of milk and enjoy every sinful, delicious bite.


This is what the inside of the cheesecake looks like. These are making me drool.

Thursday, April 21, 2011

Muffin Tops-Two Ways

I bought myself muffin top pans probably about a year ago and had never used them. I love buying new stuff for my kitchen I just don't always use the stuff right away. For my book discussion last week at the library I knew I wanted to make muffin tops. Since I like variety I made blueberry and pumpkin. They were a huge hit. More so than the book we discussed.


Blueberry Muffin Tops
taken from Pillsbury.com

Printer Friendly Version

1 roll (16.5 oz) refrigerated sugar cookies
1 1/4 cups all purpose flour
1/4 cup sugar
2 tablespoons butter
1/2 teaspoon baking powder
1/2 teaspoon baking soda
3 oz. cream cheese, softened
1 egg
1/3 cup milk
2 to 3 teaspoons grated lemon peel
2 tablespoons lemon juice
1 1/4 cups fresh or frozen (thawed) blueberries

Let cookie dough stand at room temperature 10 minutes to soften. Meanwhile, heat oven to 350 degrees. If using muffin top pans spray them with cooking spray. If using cookie sheets line two with cooking parchment paper. In small bowl, mix 1/4 cup of the flour, sugar and butter with fork until crumbly; set aside to use topping. In another small bowl, mix remaining 1 cup flour, baking powder and baking soda; set aside.

In medium bowl, beat dough and cream cheese with electric mixer on medium speed until blended. On low speed, beat in egg, milk, lemon peel and lemon juice until well blended. Stir in flour mixture just until combined (do not overmix; mixture will be a thick batter). Carefully fold in blueberries. (If using thawed berries, rinse and pat dry with paper towel before adding).

Using an ice cream scoop, scoop out the batter into each muffin top. I had two pans that equaled twelve muffin tops. If you are using cookie sheets drop batter by heaping tablespoonfuls 1 to 2 inches apart onto cookie sheets, using a rubber spatula to scrape batter from tablespoon. Bake 3 minutes; remove from oven. Sprinkle each muffin top with about 1 teaspoon crumb topping; immediately return to oven.

Bake 16 to 20 minutes longer or just until edges begin to brown. Cool on cookie sheets or muffing top pans 2-3 minutes before removing to cooling racks. Serve warm or cool.

Pumpkin Muffin Tops
adapted from the 2011 Taste of Home Quick Cooking cookbook

Printer Friendly Version

2 cups self rising flour
2 cups sugar
2 teaspoons ground cinnamon
1/2 teaspoon pumpkin pie spice
1 egg
2 cups canned pumpkin, not pumpkin pie filling
1 cup vegetable oil

As a substitute for each cup of self rising flour, place 1 1/2 teaspoons baking powder and 1/2 teaspoon salt in a measuring cup. Add all purpose flour to measure 1 cup.

Cream Cheese Icing

1 package cream cheese, softened
1 stick butter, softened
1 teaspoon vanilla
2 cups powdered sugar
2 dashes of cinnamon

For the muffins in a small bowl, combine the flour, sugar and cinnamon. In another bowl, whisk the egg, pumpkin and oil. Stir into dry ingredients just until moistened. Spray the muffin top pans with cooking spray. Using a 1/4 measuring cup fill each muffin well with batter. Bake at 375 degrees for 15 to 18 minutes or until a toothpick comes out clean. Cool for 5 minutes before removing from pans to wire racks. Yields about 1 1/2 dozen.

For the icing beat together the cream cheese and butter until smooth. Add the vanilla. Beat in the powdered sugar in increments until fully incorporated. Add the cinnamon. Spread the icing on the muffins. Store in the fridge.

Hockey Pucks-I wasn't sure what else to call them!

Hockey pucks have never tasted so good. These actually really remind me of Ding Dongs. Red velvet Ding Dongs but Ding Dongs nonetheless. I was inspired to make these after having something similar on my birthday. You may remember the little white thingies my cousin brought me from Bloomington. My version are a little bigger but oh so tasty. I made these for Joyce's birthday. She loves red velvet so I knew she would like them. And she did and so did everyone else. Will even liked them before I dipped them in chocolate. These were fairly easy to make. Which is my kind of recipe. You could easily make homemade red velvet cake and cream cheese frosting if you wanted to. I say why bother but that's just me.


Hockey Pucks

Printer Friendly Version

1 box red velvet cake mix, prepared according to the directions on the box
1 can cream cheese icing
1 bag white chocolate melts
2 bags milk chocolate chips
2 tablespoon oil

Pre-heat oven to 350 degrees.

Spray a cookie sheet with cooking spray. Measure out a piece of parchment paper that will fit the cookie sheet and place the paper on the cookie sheet. Spray with cooking spray. Prepare the red velvet mix according to the directions on the box. Spread the batter onto the cookie sheet. Bake in the oven for 18 to 20 minutes or until a toothpick comes out clean. Let the cake cook completely.

Once cooled using a round cookie cutter cut out as many rounds as you can. They will peel off the parchment paper easily. Set the scraps aside to eat or you can make cake balls with the leftovers. Cut each cake round in half lengthwise. Spread the cream cheese icing or using a piping bag pipe the icing onto one half of the round and place the other half on top. Like the picture below.

Place the icing filled round on a clean cookie sheet and place the cookie sheet in the freezer to freeze for 15 to 30 minutes.

In a microwave safe bowl melt the white chocolate melts until smooth in 30 second intervals. Once the chocolate is melted take out the cookie sheet and start dipping the rounds one at a time in the chocolate. Cake crumbs will get into the chocolate but I think it gave the finished products character. I think I was able to dip seven of the rounds before running out of white chocolate. If you want all the cakes dipped in white chocolate make sure to purchase a couple more bags and repeat the process.

For the milk chocolate place one bag of chips in a microwave safe bowl with one tablespoon oil. Microwave in 30 second intervals until the chips are meted and smooth. Dip as many rounds as you can until the chocolate runs out. Repeat the above with the second bag of chips to finish dipping the rounds. I didn't have enough chocolate to finish dipping my cakes but Will didn't seem to mind and ate the uncovered ones with now problem.

Next time I want to try chocolate cake with marshmallow icing to be more like a Ding Dong.

Wednesday, April 20, 2011

Egg Salad

I know it has been awhile since I posted last. I haven't really been cooking lately. I haven't really been feeling well lately either. I found out from the doctor that he's 99% sure that I'm suffering from migraines. Let me just say that migraines are not fun. Not a party at all. But enough about that. About a week ago I had a craving for egg salad. I'm not sure why I don't make it more often because it's easy and yummy. I like my egg salad pretty plain, eggs, miracle whip, and pepper. That's it.


Egg Salad

6, 1/4 cup servings, 3 WW points per serving

5 whole hard boiled eggs
4 hard boiled eggs, whites only
1/4 cup miracle whip
2 squirts of mustard
salt
pepper

Boil the eggs and peel them. I like to use my potato ricer to chop the eggs up. If you don't have a potato ricer and frankly I'm not sure why I have one use a knife or food processor to chop up the eggs. I like my eggs pretty finely chopped. Mix in the miracle whip, mustard, salt, and pepper. Enjoy on crackers or make a sandwich.

I only boiled nine eggs because that is all I had. You can use more mayo if you want it moister.


Wednesday, April 6, 2011

Golden Birthday Recap

My birthday was a little over a week ago on March 29. I turned 29 and I have to say it was one of the best birthday's I have ever had. My day started out with birthday wishes from my friends and family on Facebook and it just kept getting better and better. From my co-workers I received flowers, balloons, presents, and a cake. Although Joyce joked with me that I didn't make myself a birthday cake for them. I really didn't think about it. In the evening I went out to eat at my favorite place, Olive Garden, with some of my favorite girls. My cousin Kim brought me the goodies to the left in a pretty pink box from her trip to Bloomington. I unfortunately can't think of the bakery's name at the moment but OH MY Goodness were these goodies good. Starting to the left there is a piece of chocolate cake that has very little flour. The little chocolate round thing with the pecan on it contained German chocolate cake and caramel dipped in chocolate. The little round white thing contained red velvet cake and cream cheese frosting dipped in white chocolate. And last but not least is a piece of to die for carrot cake. But I do have to say that the little thingies were my favorites. I may try to replicate them. They were so good. It's a good thing I don't live close to that bakery. I would be in trouble.

Tuesday, April 5, 2011

Carnitas

I wish I would have taken a better picture because you can't see all the goodies in the pork, like cilantro, salsa, and green chilies. I think I have mentioned before loving Mexican food. I love it. I really like carnitas. This recipe was pretty good. I won't be making it a lot just because one taco is like 8 points. I can eat a lot of tacos. Next time I do make this though I would like to add the tequila it calls for. I didn't want to buy any so I just added more chicken broth. And next time I will make sure I actually buy cilantro instead of parsley so the cilantro can cook all day in the meat mixture. This was an easy meal that tasted great.


Slow Cooked Carnitas
from Taste of Home's April&May 2011 issue

Printer Friendly Version

12 four ounce servings of pork, 6 WW points per serving
Flour tortilla points vary

1 boneless pork shoulder butt roast (3 pounds)
3 garlic cloves, thinly sliced or minced garlic
1/2 tsp. salt
1/2 tsp. pepper
1 bunch green onions, chopped
1 1/2 cups minced fresh cilantro
1 cup salsa
1/2 cup chicken broth
1/2 cup tequila or additional chicken broth
1 7oz. can of chopped green chilies
flour tortillas
Optional toppings: fresh cilantro leaves, chopped avocado, tomato, onion, or cheese. I could eat cheese on everything.

Cut roast in half and place in slow cooker. Sprinkle with garlic, salt, and pepper. Add the onions, cilantro, salsa, broth, tequila, and chilies. Cover and cook on low for 6-8 hours or until meat is tender. Remove meat; cool slightly. Shred with two forks and return to the slow cooker; heat through. Spoon about 4 oz. of meat onto each tortilla and serve with toppings of choice.

Shrimp Po'Boys

I love shrimp. I'm not fond of fish but I love shrimp, crab, and lobster was good the one time I had it. Every year I look forward to Red Lobster's shrimp fest. It's so good and the last two years I have went our waitress just kept on feeding us. It was great. I can hardly wait to go this year. I like to incorporate shrimp into our dinners every now and then. It's pretty low in points and not very expensive. I found this recipe in a cookbook I checked out in the library. The cookbook is called Cooking Light Comfort Food Home Cooked Delicious Classics Made Light. The recipe calls to broil the shrimp which I think would have made these crispier but my broiler doesn't work very well so I baked them. I thought this was a very good sandwich.


Shrimp Po'Boys
adapted from the Cooking Light Comfort Food Cookbook

Printer Friendly Version

Four 4oz. servings of shrimp, 3 WW points per serving

1 lb. frozen large shrimp, thawed and tails removed
3 tablespoons dry breadcrumbs
1 tablespoon Panko, (optional)
1/2 teaspoon garlic powder
1/4 teaspoon pepper
1/4 teaspoon salt
1/4 teaspoon Cajun seasoning or more if you want it spicy
1 tablespoon olive oil
Rolls
lettuce, tomato, onion, and horseradish sauce, if desired

Pre-heat the broiler of yours works if not pre-heat the oven to 350 degrees. Line a baking sheet with heavy duty aluminum foil or a baking mat. Combine shrimp with oil, toss well. Combine breadcrumbs, panko, garlic, pepper, salt, and Cajun in a medium bowl. Stir well to mix together. Place half of the shrimp in the breading and toss to coat. Place on the baking sheet and repeat the process with the remaining shrimp. In the broiler cook for 4 minutes. In the oven cook for 10 minutes or until heated through.

Serve 4 ounces of the shrimp on a roll of your choice. Top with horseradish sauce, lettuce, tomato, and onion if desired. I think I would toast the roll next time. Give a little more crunch to this sandwich.

Chicken Capri Pasta

I found this recipe in the latest Kraft Foods magazine but you can find the recipe online as well. This recipe calls for the new Philadelphia cooking cremes. I thought it was pretty tasty but needed more sauce. Next time I will use two cooking cremes or add another block of cream cheese. Will didn't care for this meal but with more sauce I think it would have been really good.


Chicken Capri Pasta
adapted from Kraft Foods

Printer Friendly Version

5 one cup servings, 5 WW points per serving w/o pasta
Pasta is 5 WW points per cup

2 chicken breasts, thawed and cut into strips
2 cups frozen broccoli florets
1 tub Philadelphia Savory Garlic Cooking Creme (I would add another tub)
Cooked angel hair pasta (make how much you want to eat per serving)
1/4 cup Parmesan cheese

In a skillet lightly coated with cooking spray or olive oil cook the chicken until cooked through. Add the broccoli and cook for 2 to 3 more minutes or until broccoli is hot. Add the tub of cooking creme and cook for a few more minutes or until it is nice and hot. Serve over pasta and sprinkle with Parmesan cheese.